NOKIA 6300 MIC Solution
Friday, September 26, 2014
nokia 1280 not charging problem solution
so check all these parts that are indicated in this diagram and also check these links with an electronics meter and if you found any of them broken make these jumpers and also you may have to change these parts if not working with upper tricks.
Working 100 SFONE S20 Flash File DOWNLOAD
CPU Name:6250
file info:
FARSIGHTED50D_3232_11B_PCB01_gprs_MT6250_S00.S3_HM 02_P07_V0_8
Flash Size: 4mb
Password:ZxCvBnM
GO
Samsung Star Deluxe Duos S5292 Hard Reset Instructions Guide
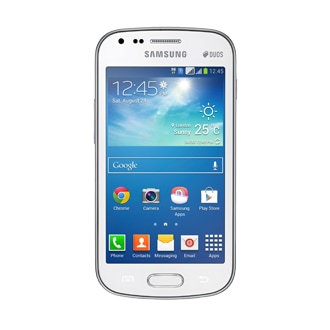
Ok, before talking about the Samsung Star Deluxe Duos S5292 Hard Reset Instructions / Guide. Here, we want to share about brief specs and features for the Samsung Star Deluxe Duos S5292. As described on the Samsung main official website, the phone comes with GSM network with frequency of 850 / 900 / 1800 / 1900 . It comes with 312 MHz processor and equipped with 3.15 camera. It has 3.5 inches, TFT touchscreen with 320 x 480 pixels resolution and support 256K colors.
Samsung Star Deluxe Duos S5292 Hard Reset Guide
There are two method or instructions to hard reset for the Samsung Star Deluxe Duos S5292. First, you must Press MENU > Settings > Reset settings > Select All (or what you want) and select YES
Or you can Enter *2767*3855#. As usual, dont forget to backup all important data like messages, contacts, and other because its will be lose.
Thursday, September 25, 2014
3120c Ringer Problem Ways Solution
following article. Nokia 3120c Ringer Ways and Buzzer Jumpers
information can be found in the diagrams further in this post.
In Nokia 3120c Ringer Problem or Buzzer Problem can occur because of
the faulty Ringer or it's bad connection to the Cell Phone's
Motherboard. Before doing any Hardware solution you should clean Nokia
3120c Ringer Ways and Motherboard of the Mobile Phone. If cleaning
does not work then you can replace the Ringer.
Please Note that we will edit these solutions or add new ones if found
in this page at any time in the future. So feel free to come back any
time on this page to stay up to date.
If you have further Questions please don't hesitate to leave a comment.
Note: Every repairing solution posted here is tested by at least one
member of our team. Use the information available here at Your Own
Risk. We are not responsible if any harm comes to your device during
the repairing process.
How to Share Content with DLNA Certified Devices on Sony Xperia Z1 Compact
When you play files from another DLNA Certified™ device on your device, this other device acts as a server. In other words, it shares content over a network. The server device must have its content sharing function enabled and give access permission to your device. It also must be connected to the same Wi-Fi® network as your device.
To play a shared track on your device
1. Make sure the devices that you want to share files with are connected to the same Wi-Fi® network as your device.
2. From your Home Lcd, tap , then find and tap WALKMAN.
3. Select a device from the list of connected devices.
4. Browse the folders of the connected device and select the track that you want to play. The track starts playing automatically.
To play a shared video on your device
1. Make sure the devices that you want to share files with are connected to the same Wi-Fi® network as your device.
2. From your Home Lcd, tap , then find and tap Movies.
3. Select a device from the list of connected devices.
4. Browse the folders of the connected device and select the video that you want to play.
To view a shared photo on your device
1. Make sure the devices that you want to share files with are connected to the same Wi-Fi® network as your device.
2. From your Home Lcd, tap .
3. Find and tap Album > My albums. All your available online albums and connected devices are displayed.
4. Select a device from the list of connected devices.
5. Browse the folders of the connected device and select a photo to view it.
Preparing to play content from your device on DLNA Certified™ devices
You must set up file sharing on your device first before you can view or play media files from other DLNA Certified devices. Your device works as a media server when it makes content available to client devices. When you set up file sharing on your device, you must also give access permission to client devices. After you do so, such devices appear as registered devices. Devices that are waiting for access permission are listed as pending devices.
To stop sharing files with other DLNA Certified™ devices
1. From your Home Lcd, tap .
2. Find and tap Settings > Xperia™ Connectivity > Media server settings.
To set access permissions for a pending device
1. From your Home Lcd, tap .
2. Find and tap Settings > Xperia™ Connectivity > Media server settings.
3. Select a device from the Pending devices list.
4. Select an access permission level.
To change the name of a registered device
1. From your Home Lcd, tap .
2. Find and tap Settings > Xperia™ Connectivity > Media server settings.
3. Select a device from the Registered devices list, then select Change name.
4. Enter a new name for the device.
To change the access level of a registered device
1. From your Home Lcd, tap .
2. Find and tap Settings > Xperia™ Connectivity > Media server settings.
3. Select a device from the Registered devices list.
4. Tap Change access level and select an option.
To get help about sharing content with other DLNA Certified™ devices
1. From your Home Lcd, tap .
2. Find and tap Settings > Xperia™ Connectivity > Media server settings.
3. Tap Question mark icon.
Nokia 2330c keypad Solution
if you check it much give few comments about this so that others can learn form your comments also.
If you have any other Questions please do not hesitate to share with me.
Wednesday, September 24, 2014
NOKIA 6300 MIC Solution
If you have any other Questions please do not hesitate to share with me.
UnRoot Manual Update Galaxy S3 I9305 with Official Jellybean 4 1 2 XXBME3 Firmware
- Create a backup of all your data with the help of below mentioned steps. Though, you can back up the data with KIES as well, we recommend you to backup manually with the help of below mentioned steps as sometimes KIES refuses to detect the device.
SMS – Use “SMS Backup & Restore app”,
Contacts – Sync with the Gmail application,
Call Log - Call Log and Restore
Images, Songs, Videos, Files – Copy to internal / External SD Card,
APN and MMS Settings – Note down from the path “Applications > Settings > Wireless and Network > Mobile Networks > Access Point Names”
- From the path “Settings > Development Options > USB debugging” enable the USB Debugging Mode. Minimum charge left in your phone is 30% or else there is a risk of device getting turned off in the middle of rooting process.
Disclaimer: Follow all the instructions mentioned in this article as if there is any damage caused due to not following instructions then we shall not be held liable or responsible. Just in case if you face any issues then we will try our level best to address the same.
- Download the latest & Official Jellybean 4.1.2 Firmware for Galaxy S3 I9305 smartphone along with Odin. Once downloaded, connect your device to the computer with the help of original USB cable and then
- Open Odin in your computer. Download Mode in Galaxy S3 I9305 can be entered by first turning Off the device and then hold Volume Down Rocker Key + Menu Button and then Power ON the device. Once the device is booted and you see the Download Mode Green Robot, you can release the button combos.
- Connect your device to the computer with the help of original USB cable and then you will see that the ID : COM section will turn Yellow / Green, indicating that all the drivers are installed successfully.
- Click on “PDA” to select the tar file which you got from the firmware package which is the TAR File which you got after extracting the file from the first step.
- Once all the file is selected, click on “Start” to start the process of firmware update. Once the firmware update process is completed which will be mentioned in the ODIN, the Galaxy S2 device will be rebooted.
- For firmware update to be finished, it will take around 2-3 minutes for applying the update. Once the device is updated successfully, the device will be rebooted. As soon as you see the Language preferences or the Home Screen, you need to disconnect the device from computer and enjoy using your phone.
Samsung I9100 GalaxyS2 Mic Not Working Ways Jumper Solution
Tuesday, September 23, 2014
Sony Ericsson F305 Schematics
Sony Ericsson F305 Schematics Download,
if you check it much give few comments about this so that others can learn form your comments also.
If you have any other Questions please do not hesitate to share with me.
How To Windows Automatic Shutdown Windows Vista 7 and Windows 8
Windows Automatic Shutdown |
Also Read: How to Recover Files in Windows
Following is the simple and easy to follow tutorial given for Windows users to automatically shut down their Personal Computer or Laptop. The basic steps for each Windows (Vista, Windows 7 and Windows 8) are same, though there may be some small variations at some steps according to your Windows version. In this tutorial, we are going to use an official tool provided by Microsoft in all Windows. This is known as Task Scheduler. It is very simple to use and also very useful. So, you dont have to download any third party software or programs to automatically shut down your computer. Following are the simple and easy to follow tutorial.
Recommended Read: How to Make Your Computer Respond to Your Voice Commands
How to Schedule Auto Shutdown in Windows Vista, Windows 7 and Windows 8
- In Windows Vista and 7, click on start button, type Task Scheduler and hit enter. Or you can run Task Scheduler from the control panel. In Windows 8, open control panel, Click on System and Security and then Administrative tools.
- Now find and Run the program in the list - Task Scheduler.
- A new Window will open. Click on create a basic task.
- Complete the first step by entering any desired name and description for the task. Here we are going to use Auto Shutdown as name and Shut Down My PC at 12:00 AM as description.
- Now click on next and you will be asked for When do you want to start the task? This is trigger section. Select your appropriate option and click next. For example, we have selected Weekly option from the list.
- Now configure your selected option. In our example, we have chosen the shut down time (12:00 AM) and the days at which computer will automatically shut down.
- Now you will be at Action window. Choose Start a Program from the list and click on next.
- In the text field of Program/Script, type the following: C:WindowsSystem32Shutdown.exe and click on next.
- Now check your task details and click on Finish.
- From now, your computer will shut Automatically according to your selected options
Sony XPERIA Ion LT28H Update To Android 4 1 2 Done How To Guide
Nokia 305 mmc problem solution
Monday, September 22, 2014
How to Install Samsung Galaxy S Duos 2 S7582 with Android 4 2 2 DDUANC1 Jelly Bean Official Firmware Using Odin Guide
Firmware details
PDA: S7582DDUANC1
CSC: S7582ODDANC1
MODEM: S7582DDUANC1
Version: Android 4.2.2
Build date: Mar 13, 2014
Regions: India, Bangladesh, Nepal, Sri Lanka
Samsung Galaxy S Duos 2 S7582 users who missed the OTA update notification or unable to access the update over Samsung KIES, can now download and install the same manually using our step-by-step guide.
Pre-requisites
1. Install USB Drivers for Samsung Galaxy S Duos 2 on the computer.
2. Enable USB Debugging Mode on the phone by navigating to Settings >> Developer Options.
3. Make a backup of all your important data before following the guide.
4. Ensure the battery of the phone is charged more than 80 percent.
5. The Android 4.2.2 DDUANC1 Jelly Bean firmware is compatible only with the Galaxy S Duos 2 (GT-S7582). Applying this to any incorrect variant might brick the device. Verify the model number of the Galaxy S Duos 2 by navigating to Settings >> About Phone.
Files Required
1. Android 4.2.2 DDUANC1 Jelly Bean Firmware (Mirror Link) for Galaxy S Duos 2 S7582
2. Odin 3.07
Steps to Update Galaxy S Duos 2 S7582 with Android 4.2.2 DDUANC1 Jelly Bean Firmware
Step 1: Extract Firmware zip file using WinRAR/7-Zip/WinZip or any other extracting tool, you will get a .tar.md5 file and some other files (optional).
Step 2: Extract Odin zip file and you will get Odin3 v3.07.exe along with few other files.
Step 3: Switch off the Galaxy S Duos 2.
Step 4: Boot the device into Download Mode by pressing and holding Volume Down, Home and Power buttons together until a construction Android robot icon with a warning triangle appears on Lcd. Now press the Volume Up button to enter Download Mode.
Step 5: Run Odin on the computer as an Administrator.
Step 6: Connect the Galaxy S Duos 2 to the computer using USB cable while it is in the Download Mode. Wait until Odin detects the device. When the device is connected successfully, the ID: COM box will turn to light blue with the COM port number. Additionally, the successful connected will be indicated by a message saying Added.
Step 7: Select the following files in Odin from extracted S7582DDUANC1 firmware folder:
- Click the PDA button and select the .tar.md5 file.
- Click the Phone button and select file with MODEM in its name. Ignore if there is no such file.
- Click the CSC button and select file with CSC in its name. Ignore if there is no such file.
- Click the PIT button and select the .pit file. Ignore if there is no such file.
Step 9: Verify everything suggested in Step 7 and Step 8 is done correctly. Then hit the Start button to begin the installation process.
Step 10: Once the installation process completes, your phone will restart and soon you will see a PASS message with green background in the left-most box at the very top of the Odin. You can now unplug the USB cable to disconnect your device from the computer.
Samsung Galaxy S Duos 2 S7582 should be now updated with Android 4.2.2 DDUANC1 Jelly Bean official firmware. Head over to Settings >> About Phone to verify the software version running on the device.
Note: If Galaxy S Duos 2 S7582 stuck at booting animation after Step 10 then go to recovery mode (press and hold the Volume Up, Home and Power buttons together) and perform Wipe data/Factory Reset and Wipe Cache Partition task before selecting reboot system now function. In recovery mode use Volume keys to navigate between options and Power key to select the option. Please note, performing wiping task will erase your device internal memory data and not external SD card data.
Read also: How to Root Galaxy S Duos 2 S7582 on Android 4.2.2 Jelly Bean and Install CWM Recovery
Nokia Asha 311 Mic Problem Jumpers Ways Solution
once you have dis assembled mobile phone look at board vary carefully and check if there is some rust or carbon.Clean
these parts and area with electronics cleaner and leave it to dry for a few mints with hot air.In above diagram all tracks are given in red and blue colors.these tracks show positive and negative paths of mic parts.so check these components and paths with electronics miter and if path missing apply jumpers.
Because mic is attached with board so you can remove it with solding iron by applying much solder on mic and then slip it once it is too hot.And use new mic to fix mic problem in Nokia Asha 311.
Root Unroot Samsung Galaxy Y Duos GT S6102
HOW TO ROOT SAMSUNG GALAXY Y DUOS:-
You Require :
-> A Samsung Galaxy Y Duos(S6102) with a Minimum Battery Of Charge of more than 50%.
-> Download the file given below and place it into your SD Card. (Note:- Not in Any Folder)
Root.zip
-> Now Switch Off your device and Enter into Recovery Mode.[By Pressing Together:- Volume(+) + Home Button + Power Button]
Now You will Enter Into Recovery Mode:-
[In Recovery Mode Touch Panel doesnt work so use Volume Up(+) Button and Volume Down(-) to Navigate.]
->Use the Volume Down(-) Button and Select Apply Update from SD Card Click The Home Button.
Browse to update.zip by using Volume Up(+) Button and Volume Down(-) Accordingly and Press The Home Button.
-> Let it Get Done.(It Wil Take Around 5-15 secs).
Reboot Your Phone When Its Done!!
Keep your Phone aside and Tell Everyone You That You ROOTED your Samsung Galaxy Y Duos!!!
Remeber:- Rooting Will Avoid Your Phone Out Of Warranty.. But Dont Worry Ill Help You To UNROOT Your Phone Again..!!
UNROOTING SAMSUNG GALAXY Y DUOS:-
In order To UnRoot Your Samsung Galaxy Y Duos.
You Require :
-> A Samsung Galaxy Y Duos(S6102) with a Minimum Battery Of Charge of more than 50%.
-> Download the file given below and place it into your SD Card. (Note:- Not in Any Folder)
Unroot.zip
-> Now Switch Off your device and Enter into Recovery Mode.[By Pressing Together:- Volume(+) + Home Button + Power Button]
Now You will Enter Into Recovery Mode:-
[ In Recovery Mode Touch Panel doesnt work so use Volume Up(+) Button and Volume Down(-) to Navigate.]
->Use the Volume Down(-) Button and Select Apply Update from SD Card Click The Home Button(to Select).
Browse to unroot.zip by using Volume Up(+) Button and Volume Down(-) Accordingly and Press The Home Button.
-> Let it Get Done.(It Wil Take Around 5-15 secs).
Reboot Your Phone When Its Done!!
Blackberry 8530 keypad not working fix problem
Sunday, September 21, 2014
Samsung S3350 Ch t 335 Cellular Phone No Power Dead fix problem
Samsung M8800 Cellular Phone Sim Ways Jumper Solution
Saturday, September 20, 2014
iPhone 5 Full Details Ways Wiring diagram fix problem
Step 1 — Front Panel Assembly
- Before disassembling your iPhone, be sure it is powered off.
- Remove the two 3.6 mm Pentalobe screws next to the Lightning connector.
- Press a suction cup onto the Lcd, just above the home button.
- Be sure the cup is completely on the Lcd to get a tight seal
- Step 3
Make sure the suction cup is firmly attached to the front panel assembly.
While holding the iPhone down with one hand, pull up on the suction cup to slightly separate the front panel assembly from the rear case.
Take your time and apply firm, constant force. The display assembly is a much tighter fit than most devices.
With a plastic opening tool, begin to gently pry the rear case down, away from the display assembly, while you pull up with the suction cup.
There are several clips attaching the front panel assembly to the rear case, so you may need to use a combination of the suction cup and plastic opening tool to free the front panel assembly.
Nokia X7 00 shows Charger Not Supported error repair solution
Friday, September 19, 2014
Blackberry 9105 keypad repair solution
Nokia C1 01 Rm 607 Latest Version 06 07 Flash Files Free Download
How To Hard Reset BlackBerry 8120
Delete all device data
Verify that you have a backup copy of your BlackBerry® device data.
CAUTION: If you have turned on content protection, the process for deleting all device data can take up to an hour to complete. You cannot stop the process after you start it. If you reset your device, the process continues after the device restarts.
Nokia 110 RM 827 Latest Firmware mcu ppm cnt Free DOWNLOAD
Nokia Latest update flash file firmware with free Direct download And Now Enjoy This Time
Nokia 110 RM-827 version 3.4 Urdu latest flash files Free direct download only 3 files MCU,PPM,CNT just click on file for direct download1)MCU
2)PPM
3)CNT
How To Easy Update Official Stock ROM For Karbonn A9 Smartphone
- Before start to update your phone, charge your phone upto 75% or more. So, then it never get switched off during the middle of the rooting process due to low battery. If it happens, this could damage your device. So, try to charge your phone completely, before initiate the updating process.
- All of us stored some important or personal datas on our phone. By trying rooting process they may get deleted. So, before begin the rooting process, take a backup of all the datas as you feel it is important for future use “especially contact numbers”.
- Next enable the USB Debugging mode option in your phone by following the path “Settings > Applications > Development > USB Debugging”. This is very much important so then your Karbonn A9+ smartphone can communicate with the computer.
- First, download either one of the link from below and place the downloaded file to your SD card
- Both the link will lead you to same stock ROM, so download any one. The ROM will be flashable .zip archive, don’t extract it.
- After that place the downloaded ROM to your SD card. Press and hold the Power button and Volume Up button for few seconds until it display a green Lcd.
- Release the button when it shows the red Lcd.
- Now you should have booted your mobile into the recovery mode, from there make a factory reset.
- After that select the apply update from the external storage and select the ROM file from SD card (Volume Key-Move up/Down, Power Key-Select).
- Wait for few minutes to flash the update.
- Once the process is finished, select the reboot system now option.
Thursday, September 18, 2014
18 11 13 AMDO OTZFlasher MTKReader Updated ! Orange Hiro ZTE Blade G ACER Z3 etc
OTZFlasher_v1.0.0.1309
-------------------------------
[x] Fixed unlock over COM1 [timeout problem]
QCOM_SMART_TOOL_v1.0.0.8760
------------------------------------------
[x] Telenor Smart Touch Pro/ZTE Blade G - DIRECT UNLOCK FOR ALL FW VERSIONS
NOTE: Some people still ask me on skype about direct unlocking for Alcatel Android models (ex 990/81 etc). THIS IS ALREADY SUPPORTED SINCE MONTHS. So update your soft !
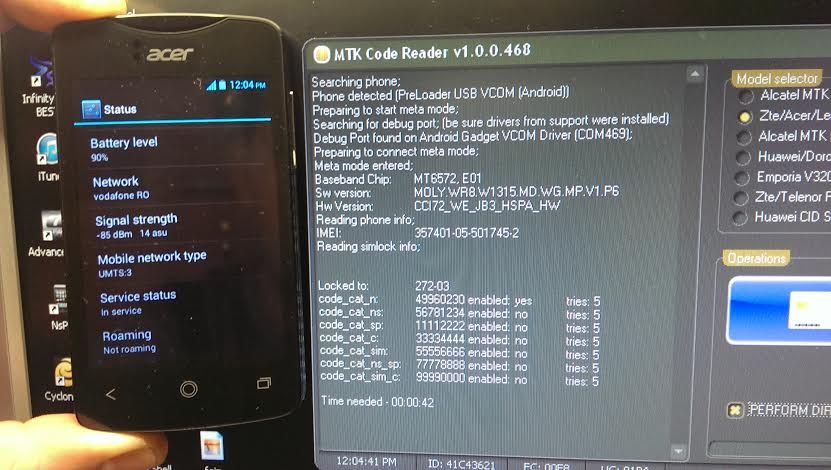
MTKReader_v1.0.0.468
-----------------------------
[x] CODE READ AND DIRECT UNLOCK FOR ORANGE HIRO/OT-6012/IDOL MINI
[x] CODE READ AND DIRECT UNLOCK FOR ACER Z3
VIDEO TUTORIALS AVAILABLE TOO
How to Import Contacts from SIM Card on Huawei Ascend Y210
Follow these steps on how to import contacts from SIM Card:
1. On the contact list Lcd, tap on the 3-horizontal icon.
2. Then select Manage Contacts.
3. Tap Copy from SIM card. (Make sure that your SIM card is inserted on your phone.)
4. Touch one contact to individually import, or tap Select All to import all your contacts.
5. Then tap Copy.
Note: If you have more than one account on your phone, tap on the account you want to import the contacts.
Nokia 1661 pa jumper
Wednesday, September 17, 2014
Nokia Asha 503 RM 920 Latest Firmware Version 12 0 26 Free Download
Product Type : RM-920
Firmware Version : 12.0.26
Variant Id : N/A
Varian Name : RM-920 NDT EURO EU1 IT
Product Code : 059S8X7
File Size : 216 bytes
File Name : rm920_12.0.26_Empty_SD_4GB.cardverref.xml
File Size : 264 bytes
File Name : RM920_059S8X7_ccc_v273.bin
File Size : 916 bytes
File Name : RM920_059S8X7_12.0.26_273.spr
File Size : 1,12 KiB
File Name : P11660901dpi600_label_layout.xml
File Size : 1,89 KiB
File Name : nontz_deviceiapsvctagcertificate_template_production_v12.bin
File Size : 2,43 KiB
File Name : RM920_059S8X7_12.0.26_273_signature.bin
File Size : 2,58 KiB
File Name : RM920_059S8X7_12.0.26_273.vpl
File Size : 4,63 KiB
File Name : S40NG_DCT4_open_simlock.sim
File Size : 7,07 KiB
File Name : P11660901dpi600.pcx
File Size : 13,64 KiB
File Name : RM920_059S8X7_12.0.26_273.dcp
File Size : 420,86 KiB
File Name : rm920_12.0.26_059S8X7_eu1.rofs.fls
File Size : 7,2 MiB
File Name : rm920_12.0.26_Empty_SD_4GB.fpsimage.fls
File Size : 8,41 MiB
File Name : rm920_12.0.26.mcusw.fls
File Size : 37,41 MiB
File Name : rm920_12.0.26_059S8X7_eu1.image.fls
File Size : 42,96 MiB
How To Root I535VRUCML1 Verizon Galaxy S3 SCH I535 Android 4 3 JB Firmware
Though root don’t erase internal memory data but we recommend to back up your data first before proceeding to avoid any uncomfortable situation.
1. Backup your device data. You can follow our ultimate backup guide.
2. Make sure your device have at least 60% battery power. You can install an app like Battery Notifier BT Free on your Android device to check it easily.
3. You already have USB Driver Installed for Verizon Galaxy S3 SCH-I535 in your PC. [Download USB Drivers]
4. Make sure USB Debugging is enabled otherwise you won’t able to transfer file between PC and Verizon Galaxy S3 SCH-I535.
5. This method may require a bootloader unlocked device.
How To Root I535VRUCML1 Android 4.3 Jelly Bean On Verizon Galaxy S3 SCH-I535
- Download Odin v3.09 and root file for I535VRUCML1.
- Extract CF-Root zip file that you downloaded earlier from above link, you will get a .tar.md5 file.
- Extract Odin zip file and you will get Odin3 v3.09.exe along with few other files.
- Power off your Android device. Wait 5-6 seconds for vibration to confirm complete switch off.
- Now, put the Verizon Galaxy S3 SCH-I535 in Download Mode by pressing and holding down the Volume Down, Home and Power button together. A warning Lcd will come up; press Volume Up button to enter Download Mode.
- Now run Odin3 v3.09.exe (see Step 3) as an Administrator because Admin privileges is required to complete the process smoothly (only applicable Windows Vista and higher).
- Now connect your device to your PC using USB cable. An “Added!!” massage will appear in Odin’s message box. If you don’t get the same then you should try another USB port (try USB port located in back in your desktop PC). If that too don’t work then you should reinstall the driver. If you successfully see the “Added!!” message in Odin then you are ready to go in next step. You should also see COM port with a number in Yellow if you successfully added your device.
- Click the AP Button (PDA button for old Odin), and select that CF-Auto-Root-d2vzw-d2vzw-schi535.tar.md5 file that you get in Step 2.
- In Odin window, make sure only Auto Reboot and F. Reset Time checkboxes are selected.
- Double check everything that we mentioned in Step 8 & Step 9 above. Now, once satisfied hit the START button to begin the flashing process.
- Once flashing completed, your Verizon Galaxy S3 SCH-I535 will restart and soon you will see a PASS message with green background in the left-most box at the very top of the Odin. You can now unplug the USB cable to disconnect your device from computer.